I recently completed a project for the Marshall M Fredericks museum at Saginaw Valley State University, commemorating the anniversary of the iconic Spirit of Detroit sculpture. For the unfamiliar, the Spirit of Detroit is one of the most prominent sculptures in the city, and it’s presence has long defined the landscape of downtown. The museum approached me thanks to a recommendation by a fellow alumni of Notre Dame Preparatory High School, Melissa Gerst Ford, who happened to be working there at the time. The initial brief read as follows:
In 2018, “The Spirit of Detroit” at the Coleman A. Young Municipal Center in downtown Detroit will be celebrating its 60th anniversary. As part of the celebration, the Museum will be hosting both a gala event in Detroit and an exhibition on “The Spirit of Detroit,” which will include commissioned artwork, information on the sculpture’s history and meaning, as well as poetry, essays and artwork from Detroit schoolchildren at the museum in Saginaw. We would like to have an animator create a brief 30-second animation of “The Spirit of Detroit” coming to life, leaving its base and then walking up I-75 towards the museum. Basically, something that fits the tagline, “The Spirit” comes to Saginaw.
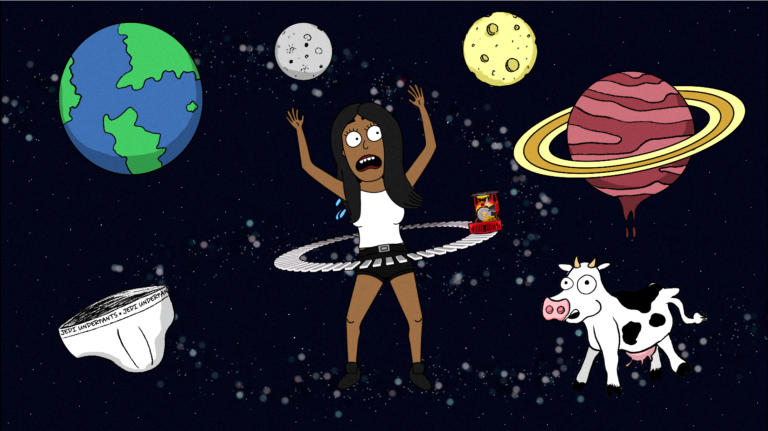
With this brief in hand, we began to discuss a potential script as well as the look of the piece. I sent over a few different videos I had recently animated or designed. They particularly liked a piece I had completed earlier that year as part of the School of Motion Character Animation course, which you can see here:
I didn’t design any of the sets or character for that piece (with the exception of the mountains and some of the extra leaves and foliage). I was very clear about that up front, as I really try to be honest and direct about my design skills and strengths. My initial concern with the project was that the client might want to take a 3D approach, which would greatly inflate the budget, require a larger crew, and potentially be beyond my skill set. The other concern I had was that a humanoid character might require more flexibility than an average DUIK rig in After Effects could provide. We did decide to go with a 2D graphic approach using Illustrator and Photoshop for the design process and After Effects for animation.
From the brief, the client crafted a script that I then reviewed and offered suggestions:
The Spirit of Detroit Takes a Holiday
The Spirit of Detroit wakes up.
The sound of metal twisting and turning as the sculpture stands.
The giant sculpture shakes off a 60 year slumber.
He looks around for a sense of direction. Maybe licks a finger and puts in the air to check wind direction
before he travels.
The Spirit walks across Woodward Avenue to kiss Giacomo Manzu’s nude ballet sculpture, Dance Step,
before heading north.
He steps onto the roadways and begins his walk. He walks north on Woodward Avenue to Marshall
Fredericks’s former home and Greenwood Cemetery in Birmingham to pay homage to his creator.
Eventually The Spirit is walking along I 75. Maybe he leaves green footprints.
Maybe comically he does a little hitchhiking with a “Saginaw Valley State University or Bust” sign in
hand.
The mile markers are clearly noted as they appear along the road.
He arrives at the exit and then SVSU.
He walks through the sculpture garden and into the Museum. He looks approvingly at the quarter scale
plaster model of The Spirit of Detroit.
He walks out of the Museum and finds his favorite spot in the Jo Anne and Donald Petersen Sculpture
Garden and stops to rest a while.
Shortly he learns the Detroit Red Wings have a good chance of winning the 2018 Stanley Cup and he
must go back to Detroit.
The sound of a well-oiled piece of bronze as he assumes his sitting position at the corner of Woodward
and Jefferson.THE END
Once we were happy with the first draft of the script, we created thumbnail storyboards, which are basically crude storyboards that allow me to work faster to determine timing and staging quickly.

What we quickly determined after creating the rough thumbnails was that our story was far too long. We went into the script and started to cut down or completely excise scenes that we felt would run beyond a reasonable length. One scene, for example, took place in the cemetery where Marshall M. Fredericks is buried. We were going to have the sculpture pay its respects to it’s creator. This moment would have been nice, but it would have completely slowed down the forward momentum that we had built up during the walk up Woodward. So, instead, had him walk by the cemetery and had the grave cross the frame. Once the story was in a better place, we moved on to creating full boards and style frames.
Here you can see the story starting to take shape. At the point we had this board, I had already done all of the character and set design. My process was to design everything in Illustrator, and bring it in to photoshop for texturing. You can see that in some of the before and after designs I created. In the scene below, notice that I used the airbrush tools to add a light grain and gradient to all of the elements.


One of the biggest challenges in designing the assets for this video had to do with how to handle the sculpture itself. I quickly realized while measuring the original that the proportions were not accurate to a normal human. Had I gone off the original design, the legs would have been almost two torsos tall. In order to get around this, I could not have the sculpture be shown in the process of standing up. That is why there is a close up added to show the family in his one hand, and I establish his movement by shaking the camera and having the sounds of groaning metal in the soundtrack. When we cut back, he is crouching to put down the family. To lock down the spirit, we went through a lot of iterations. You can see some of the variety below:


Once I had an approved Spirit, I was able to proceed with the full color storyboards and style frames. You can see below how the elements came together. In some cases, I would go back later and add more texturing if I thought there were inconsistencies.

The struggle as I built the rig, or skeleton, for the Spirit was determining how much built in movement made sense. Too few joints, and he would look stiff and robotic, but too many and the animation process would quickly become overly complicated. Before this, I had never built a mostly realistic human skeleton, so the challenge was a pretty significant one.

The rig itself was built using DUIK, a script for After Effects that is FREE and allows you to create your own character rigs, as well as automatic certain motion processes. In the above photo you can see the controls that allowed me to control the sculpture during the animation process. Underneath all of these are hidden bones and puppet pins that code then tells the controllers to manipulate. Below, you can see some of the auxillary sliders I built into the controllers to allow for the switching of hands, mouth, eye control, and loin cloth sway.


To get an idea of how many layers I had visible, versus the ones I kept hidden, you can have a look at my timeline with hide turned on and off.


Once I had the Spirit rigged, I started to build each individual scene out. I found the best way to organize is identify Scene numbers and then create a different pre-comp for each scene, with all the of the scenes living in a main composition. To manage this, you can stack different timelines above each other in After Effects. So, for example, you can have the character rig timeline open above the main timeline if you need to check timing on something. One plugin I found HIGHLY useful for this project was Universal Audio, available from AE Scripts (https://aescripts.com/universal-audio/), which allows you to monitor audio across timelines. This is extremely useful when working between a character comp and a scene comp.
Like any animation, I did my keyframes first, using hold keyframes in After Effects. Once my timing and poses were where I wanted them, I went through and started to smooth all of the animation. One problem I did solve later on in the animation process was how to make the cars on the highway move in perspective while still matching the flat designs earlier in the piece. The solution was to create very flat looking car models in C4D, and then texture them using only the luminance channel in Cinema 4D.


The most difficult part of combining the CGI cars with the after effects project had to do with matching the planes between the two. I was able to do this by using the camera in After Effects with the wireframe turned on so I could match them up along the plane. I set up a mask in After Effects at the horizon line to make the cars disappear when they were at the very edge.
Other small details that you may not notice unless you look closely, involve tiny movements that sell the animation as a whole. The light rail in Detroit, the people mover, and smaller individual cars all had to be animated to give the piece a feeling of constant movement. I also incorporated tradigital animation to create the newspaper scene.

The newspaper flying in was create in Adobe Animate using traditional keyframe animation techniques. I also used this technique to creating the exploding hearts near the beginning. I animated those in Photoshop, and then simply duplicated the image sequences. One more small effect I incorporated was a particle system created in Trapcode Particular that was used to mimic mist forming around the museum fountains. You can see an example in the following photo:

In the end, there were several revisions, but most were small changes to language, adding two roadsigns, the addition of a text slate at the end, and adjusting awkward poses that didn’t quite translate to movement. What I learned from this more than anything was the importance of finessing the story, locking down the script as much as possible early on, and really honing the style and look of a piece before any movement was made on rigging or animation. As much work as animation itself can be, having the entire film in front of me on paper helped immensely with my process and probably saved us hours of time that could have been wasted.
I do have a few technical takeaways from the project. I’ve realized that I overcomplicated my backgrounds. There is details in many of these that does not enhance the story, but does add to the accuracy for some of the locations. Doing it again, I think I would push the stylization further. On the other hand, certain scenes seem empty to me now. I feel like the birch run/flint segment could easily have something else going on in the background to create a more rich texture. In terms of character design, I learned so much. I had swappable hands, but I realized quickly that I didn’t build them out around a circular form correctly. In the photo below you can see my initial attempt to make sure all of my joints were flush.

Because the hands were swaps, I couldn’t always figure out where to line up the thumb, so there are many times I had to edit the hand later. Unfortunately, I did NOT set the comps to the full layer, and instead retained layer size. This caused strange errors in the hands later when I tried to edit them. In retrospect, I really should have created separate moving fingers and thumbs for many of the scenes. That being said, the other joints really did work well, and the hip and chest swivel controls worked fantastically for manipulating the character. If I did one thing differently to create a more fluidly moving character in the future, I would add more points of movement.
I hope that anyone reading this now has some insight into my process for creating this project, and that they may feel inspired to go out and create their own animation. Animation is a constant learning process, and that I still have a long way to go, but I hope I can help someone else learn from my experiments and mistakes.